This post is the second one in the tutorial for setting up VS Code environment for Python and developing & deploying AWS Lambda functions written in Python automatically to AWS, without the need for any manual labour for deployment everytime.
This post focuses on connecting to your AWS account and deploying serverless applications to it.
To see how to setup Visual Studio Code for Python, checkout this post first.
After you finish this second part of the tutorial, you will be able to:
- Connect your Visual Studio code environment to your AWS account
- Create new AWS Lambda functions locally on Visual Studio Code.
- Deploying your serverless applications using AWS SAM to your account using Visual Studio Code automatically.
Lets get started.
Create AWS IAM Role
You need to create an AWS IAM role that your Lambda function will use to write logs to AWS CloudWatch. So create a new IAM Role:
- Open IAM console.
- Click Roles
- Type of Trusted Entity
- AWS Service
- ‘Choose the Service that will use this Role’
- Lambda
- Click Next: Permissions
- Choose LambdaBasicExecutionPolicy
- Provide a Role Name
- Create the Role.
Create S3 bucket
You need to create an S3 bucket to which your Lambda code will be deployed from VS Code:
- Open S3 console.
- Click Create Bucket.
- Enter a name, choose the defaults and create the bucket.
Install AWS CLI
Install the AWS CLI as it will be used by the AWS Toolkit for VS Code.
Install Docker
Install Docker Desktop. As AWS Lambda functions are run by spinning up a new container for each concurrent invocation, the AWS Toolkit for VS Code is going to emulate that behaviour by firing up a new container when we try to run or debug our Lambda function locally, so that our function running locally replicates exactly what is happening on AWS Lambda.
Install AWS SAM CLI
You need to install SAM CLI for your operating system, it is required by the AWS Toolkit for VS Code.
Verify the installation using:
sam --version
VS Code Installations
- Open Visual Studio Code.
- Go to ‘Extensions‘.
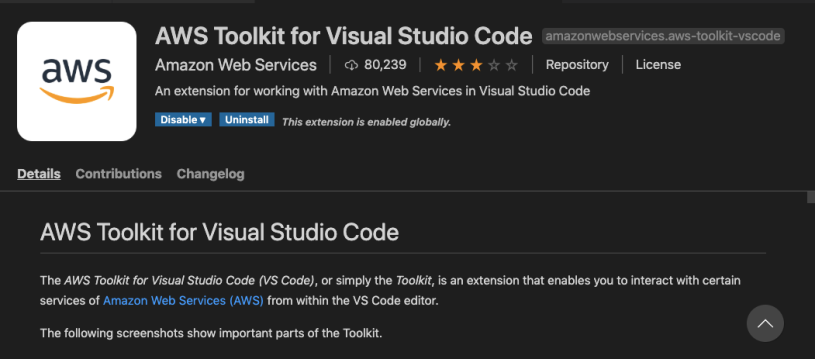
- Search for the extension ‘AWS Toolkit for Visual Studio Code‘
- Install and reload VS Code if prompted.

Create AWS Credentials
In order to connect to your AWS account from your Visual Studio Setup, you will need to create new AWS credentials and provide them to Visual Studio Code. To create the credentials:
- Go to IAM Console
- Click ‘Users‘ and then Add User.
- Enter a user name and check Programmatic Access.
- Click Next: Permissions > Attach existing policies directly and select the following 2 policies(you can choose even tighter policies if your requirements permit):
- AWSLambdaFullAccess
- AWSCloudFormationFullAccess
- Click Next: Tags, Next: Review and finally Create User.
- Your new access and secret key will be shown, download it and store it in a safe place as this is your only chance to do so. You are to never share this key outside of your organization, even when someone from apparently AWS. AWS personnel never asks from anyone for their secret key.
- Your secret key credentials are stored in either the shared AWS config file and the shared AWS configuration file. These files are stored in the .aws folder in the home directory.
- Credentials for multiple AWS accounts can be stored here using a concept called profiles.
Next, provide the credentials to Visual Studio Code:
- Open VS Code.
- Open the Command Palette:
- On Windows and Linux: Ctrl+Shift+P
- On MacOs: Shift+Command+P
- In the search bar enter ‘AWS: Create Credentials Profile’
- Enter the name of the profile and the Access & Secret key
- After it’s done, you can open the shared files by following the same command in the command palette: ‘AWS: Create Credentials Profile’ and it will open the config and credentials files for you.

For more info, check out AWS credentials and config documentation.
Connect to AWS
Next up, we connect to AWS:
- Open Command Palette.
- Enter ‘AWS: Connect ot AWS’
- Choose your desired profile.
- One the left side bar, click the AWS Explorer. If the connection is successful, you will see the CloudFormation, Lambda and Schemas sections.

Create new SAM Application
AWS SAM is a template driven paradigm, whose foundations are identical to CloudFormation but it is built specifically to deploy AWS Serverless applications using templates. Your deployed infrastructure stack using AWS SAM templates is visible in AWS CloudFormation Console in the same way as standard AWS CloudFormation stacks.
To create a new SAM application:
- Open Command Palette
- AWS: Create new SAM application
- Select a runtime, select a folder and provide a name
- A workspace will pop in front of you.
You can see your function inside the hello_world folder with the name app.py, a file named __init__.py and the requirements.txt file which contains the dependencies.
Creating a new function within the serverless application
If you want to create a new Lambda function, you can create a new folder inside the folder of the serverless application you just created and create new app.py, __init__.py and requirements.txt files inside of it. For every function that you create, you will need to define it as a new function in the template.yaml file just like the definition of the hello_world function created by default(when we created the new AWS SAM application). Editing the template.yaml file is outside the scope of this article but this gives you an idea what you need to do if you want to create a new function.
UPDATING Lambda Function Role
We created a role at the start, now open your AWS IAM Console, click Roles, choose your Role from the list and copy the Role ARN.
Now from your serverless app in VS Code, open up template.yaml, add a new element under Runtime and paste the Role ARN against it:

This will allow your Lambda functions, when deployed, permissions that the specified Role has. For now, we have added the LambdaBasicExecutionRole permission added to the role, which allows the Lambda function to write logs in CloudWatch.
Debugging Lambda Function Locally
Now its time to debug the Python Lambda function locally on VS Code.
Open the hello_world/app.py file, you are going to see the CodeLens options for running, debugging and configuring the Lambda function:

Click the Configure link. templates.json file is going to open up and looks like this:
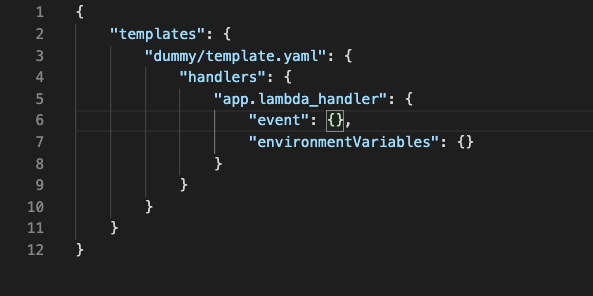
Notice the empty event element. We need to provide a value here which is a replica of name-value pairs used by actual AWS Lambda. So in the terminal, paste the following command:
sam local generate-event apigateway aws-proxy | pbcopy
This command is going to generate the event values that are going to work when we try to run or debug the Lambda function locally. We pipe the command with the pbcopy command so that the result of the command is copied to our clipboard.
So run this command, the output is now going to be copied to your clipboard. Just remove the {} from the event element:
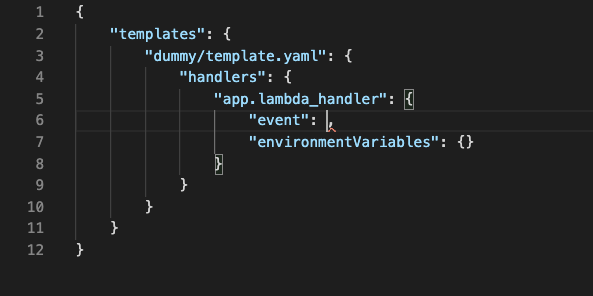
and just run the command to paste(Command+V or Ctrl+V). This is going to paste the output of the command that we ran to the place where our cursor was positioned. Make sure you paste it in the place as shown in the above snapshot. Your event element is now going to look like this:
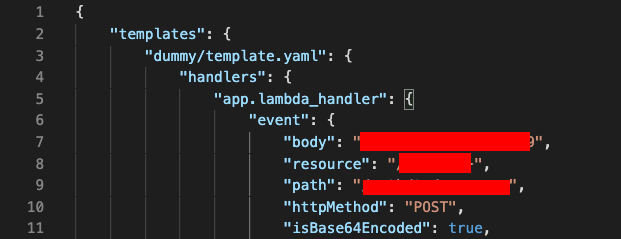
Now open you lambda function again in hello_world/app.py, enter a simple line of code such as print("Hello world") and click Debug Locally on the CodeLens:
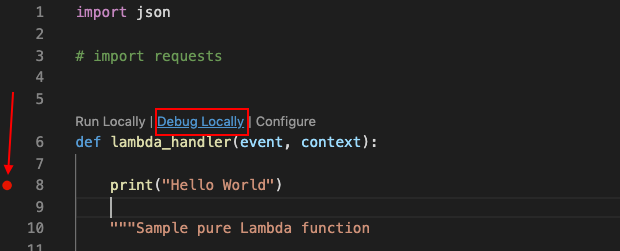
When the runtime hits your breakpoint, you can hover over your event parameter and it will show the values that you provided in the templates.json file.
Known Issue:
While trying to debug the program for the first time ever, your VS Code and AWS Toolkit is gonna try to fetch the corresponding Docker image for the runtime that you have configured and while trying to fetch it, it might show and error like the following:
Fetching lambci/lambda:python3.7 Docker container image.............................................................................
The SAM process did not make the debugger available within the time limit
This is due to some timeout configuration inside VS Code. I haven’t investigated this setting. But to avoid this, you can manually pull the Docker image yourself using the terminal by running the following command:
docker pull lambci/lambda:python3.7
You can replace python3.7 with the runtime that you are targeting.
Deploying a SAM application
Now to the most exciting part, deploying to your AWS account using your Visual Studio Code setup:
- Open Command Palette
- AWS: Deploy SAM Application
- Select the
template.yamlfile which is in the project that you want to deploy. - Select a region.
- Select the S3 bucket that you created earlier in this tutorial.
- Enter the name of the CloudFormation stack. This will be used to distinguish this stack from the others in CloudFormation console.
- After entering the above information, your Output tab in Visual Studio will appear and will show the status of different operations such as uploading code to S3, deploying stack in CloudFormation and a final message that the deployment was successful if all went well.
With the successful deployment of the AWS SAM template, your serverless application is now up and running on AWS. Your AWS SAM template.yaml file by default is going to include AWS Lambda function and its corresponding API. You can check by going to the consoles of Lambda and API Gateway and check that the expected infrastructure is indeed visible there. You can add more supported elements to the template.yaml file as you wish and they will be deployed automatically everytime you deploy your template.yaml file.
Summary
This second part of the tutorial(click here for the first part for setting up your Visual Studio Code environment for Python) describes the step by step procedure of how you can connect your local Visual Studio Code setup with your AWS account and deploy your serverless application to your AWS account with only a matter of some clicks after it is setup, without the need to manually bundle, upload or setup for the deployment everytime.
One thing it would be great to know, is once you’ve deployed your app, a short tutorial on how you can subsequently update *just* the lambda code, without deploying everything every time.
LikeLike
OK – so I worked this out! Here’s how I did it in case anyone else needs to:
* Click on the AWS icon in your VS code toolbar
* Using Explorer, find your Lambda – in e.g. Europe (Ireland) > Lambda > MyLambda
* Select the directory to be the one with your app.py in it (not the root folder of your project with template.yaml in it)
* Build directory = Yes
* Immediately publish = Yes
LikeLike